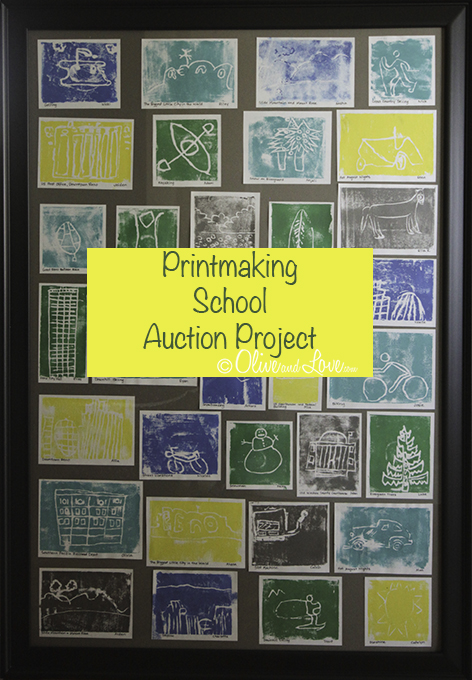
Reno's Best - Printmaking Children's Art Auction Project
You may remember some of my previous student art auction projects:
Introducing
"Reno's Best"
A collection of small prints representing Reno's popular events, activities and seasons.
IMG_2680 copy copy

20120501-IMG_2680

Untitled-2
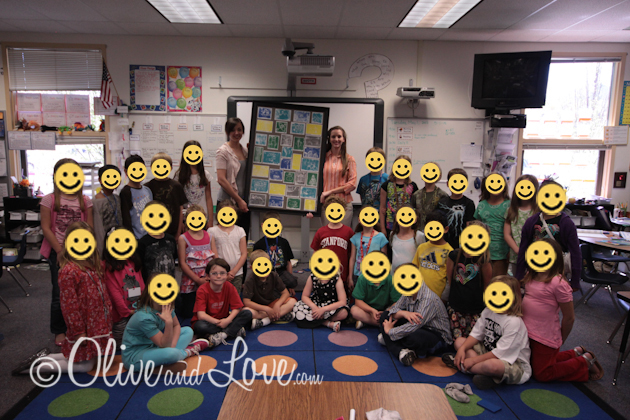
Inspired by a project by Glitter Goods, I worked with 33 second graders and about 6 or 7 parent volunteers to complete this print making project (for our school's Fine Arts night auction).

Untitled-1
I collected photos off the internet of buildings, landscapes and activities, that are associated with our town, Reno, Nevada. I printed them and taped them to a blank sheet of paper. I drew a simplified version of the photo on the paper, leaving space for the students to practice their own rendition. Remember that with printmaking, the final print is backwards. When drawing mountains or signs, be sure to give the students a backward image from which to copy so the final will be in the correct format.

20120323-IMG_2121
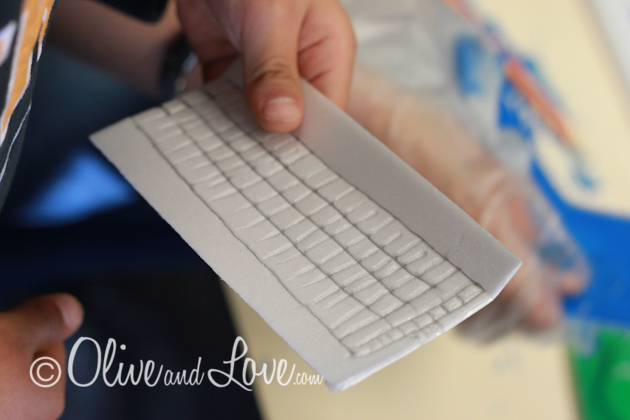
I picked up a pack of styrofoam food trays from Smart and Final and used the paper cutter in the teacher supply lounge to chop them into three variations of rectangles. I opened the package hours before the class workshop and found they were printed with an oval logo on the bottom. Thankfully my sample didn't show any of the oval on the the final print however a couple students carved on the wrong side and their print was stamped. If I did a repeat of this project for an auction, I would purchase 'Scratch Foam', a product made for this process.

20120323-IMG_2122
I wasn't exact about cutting (or using) equal amounts of each shape. I made sure that even if the prints used all of the largest sized styrofoam, that they would still fit my previously purchased frame.

20120323-IMG_9237-1
After the prep work was complete, I explained the basics of print making to the students. I showed them the brayer (roller), the ink, the styrofoam and explained how to carve a simple drawing using a dull pencil.
At the last minute (as usual), I had the the parent volunteers help me trace the appropriate size styrofoam rectangle onto each paper so when the students practiced the drawing, they would know how to fill the space.

20120323-IMG_2123

20120323-IMG_9247-1
The students got to work practicing their simple line drawing for the carving.

20120323-IMG_2124
R just 'LOVES' that I gave him one of the RENO signs to draw backwards, and as you can see, his excitement here is contagious!

20120323-IMG_9277-1
Once the student had mastered the drawing, they were given a coordinated styrofoam rectangle to begin carving.

20120323-IMG_9250-1
I love that the student given the Burning Man symbol is wearing tie dye!
20120323-IMG_9328-1
Make sure the carving is deep enough that you can see a deep crevice. If it is too shallow, it will fill up with ink and will not print the design.
20120323-IMG_9269-1
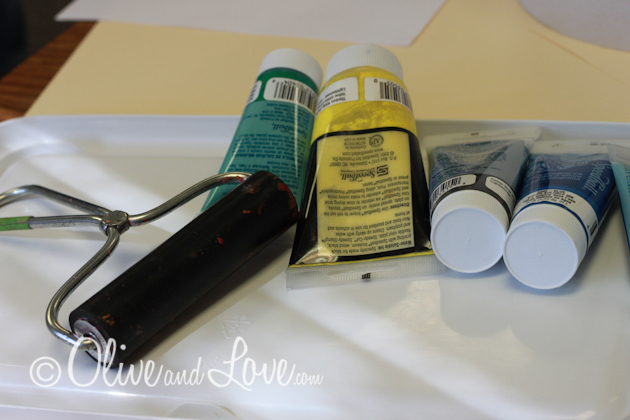
We used five colors of Speedball ink: pewter, yellow, turquoise, green and blue. The brayers were provided by the school art room. They are about ten bucks each so I'm glad we didn't have to purchase them. We used tupperwear lids to roll out the ink. Glass would be better or perhaps some plastic lids from those baby greens (lettuce) containers. Whatever you use, wash it soon or you won't want to use it for anything else. I plopped all mine in a plastic bag to wash when I got home but it got lost in the depths of my garage and now I can't get it all off. Good thing the lids came from my collection of extra tuppewear lids...(Can you hear my husband chanting "Horder! Horder!")
20120323-IMG_9272-1
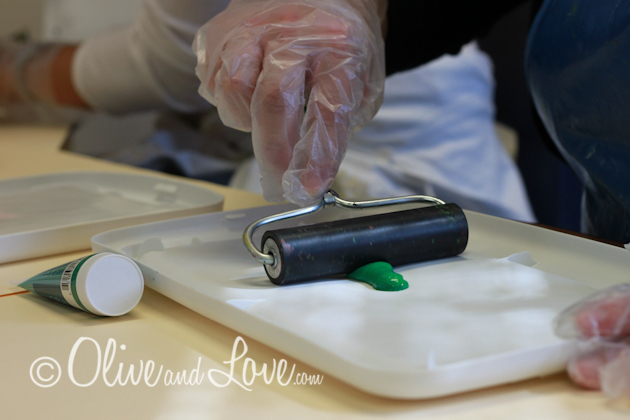
Plop a drop of ink on your surface and roll your brayer until it's covered with an equal amount all around.
Tip: The rubber brayers seem to use less ink then the spongy brayers.

20120323-IMG_9273-1
You don't want any big blobs of ink and you don't want any areas without. There is a happy medium where you will hear a sticky sound when you roll the brayer.

20120323-IMG_9311-1

20120323-IMG_9329-1
Roll the ink onto the styrofoam.

20120323-IMG_9282-1
Turn the styrofoam ink side down onto your paper. We used print making paper from Nevada Fine Arts, an art supply store in town. Be sure not to wiggle the styrofoam but to press firmly. There is a tool called a barren that is traditionally used for this process however you can use the back of a spoon or the palm of your hand.

20120323-IMG_9308-1
With so many wonderful volunteers, we were able to have one adult for each color. Wear gloves because this ink really likes to hang out on your hands for a few days.
20120323-IMG_9315-1
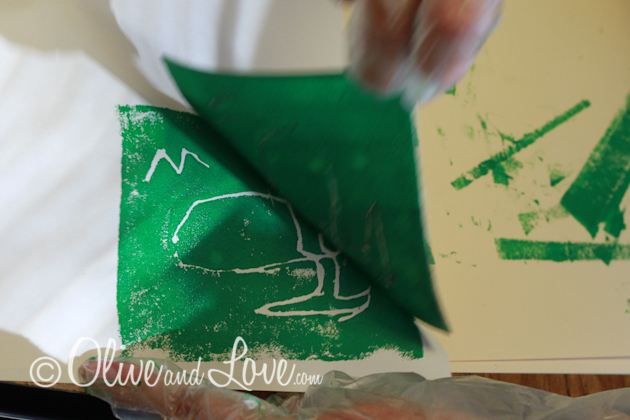
Peel away the styrofoam carefully and voila! A print!
20120323-IMG_9298-1
Tip: Keep the styrofoam carvings in case you find later that one needs to be reprinted. (We did not do this but I wish we had).

20120323-IMG_9321

20120323-IMG_2125
We let our prints dry for the weekend and Monday morning I picked them up and took them home. I gave them preliminary labels with names and titles and handed them off to a fellow mom to label them with nice handwriting.

20120426-IMG_4733
I used a clear ruler to line each print with a quarter inch border. Using my trusty slide cutter from the craft store, I trimmed down each print.

20120430-IMG_2675
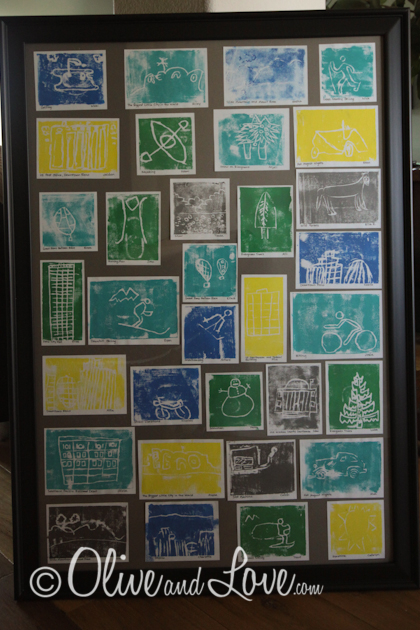
I laid the prints out on a grey mat that was cut to the size of the frame by Aaron Brothers. They were a bit tight so I decided they needed a smaller white border.

20120501-IMG_2676
Starting with even shaped rectangles made it easy to trim down the edges. Just a bit off each one was enough to give the prints enough space between each other.
20120501-IMG_2680
This amazing piece of artwork will be on silent auction at our Fine Arts Night on May 11, 2012
20120501-IMG_2691 copy
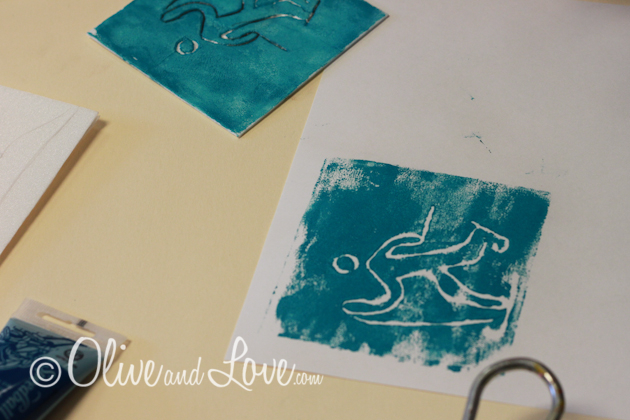
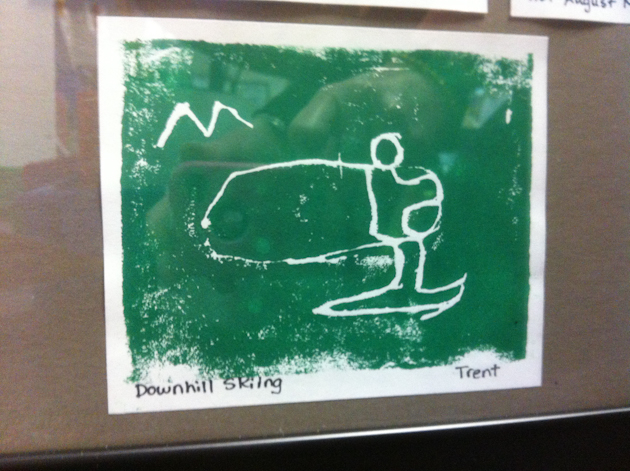
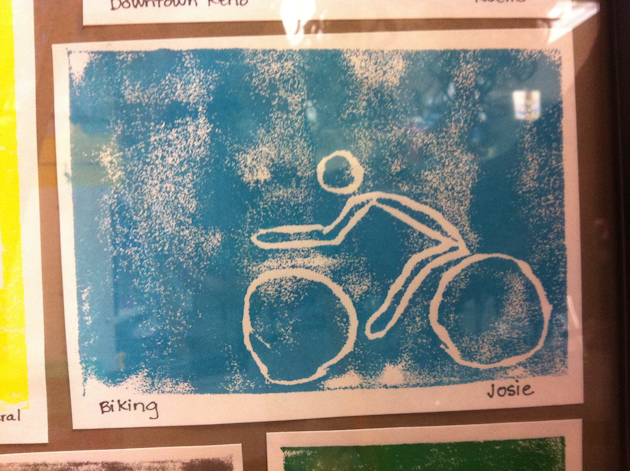
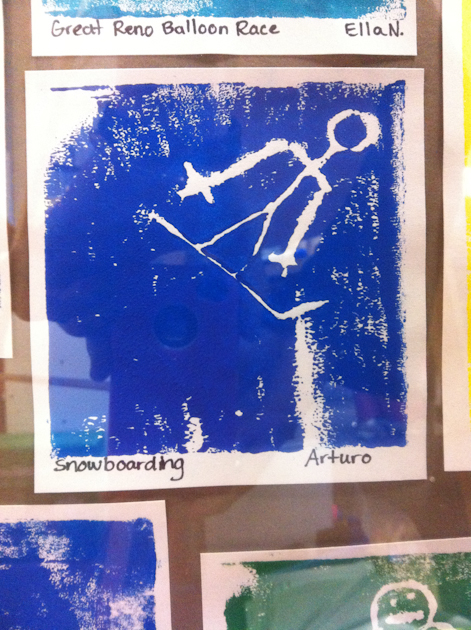
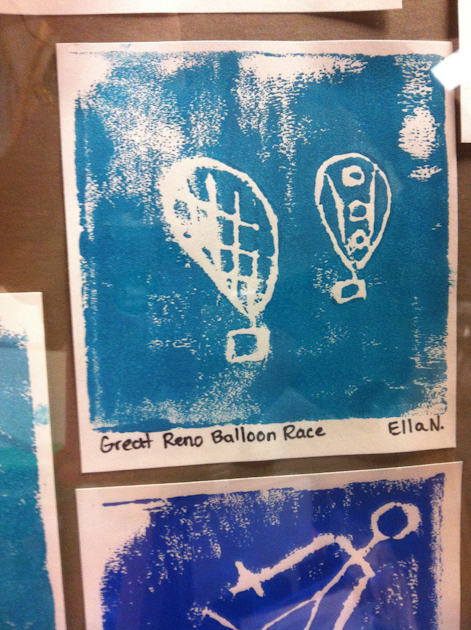
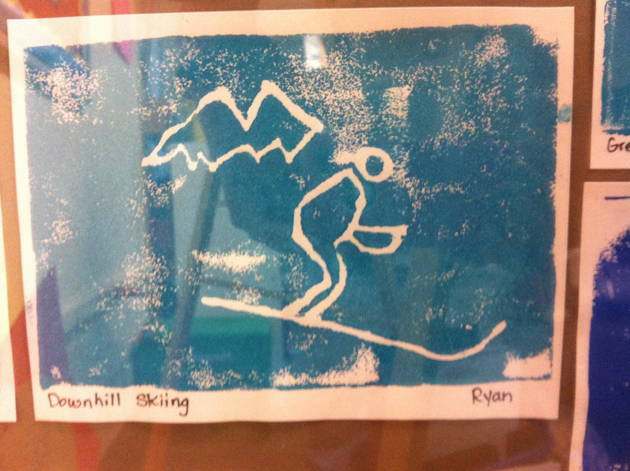
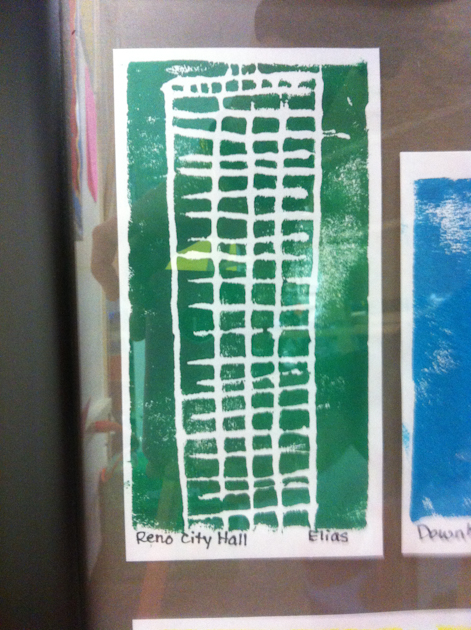
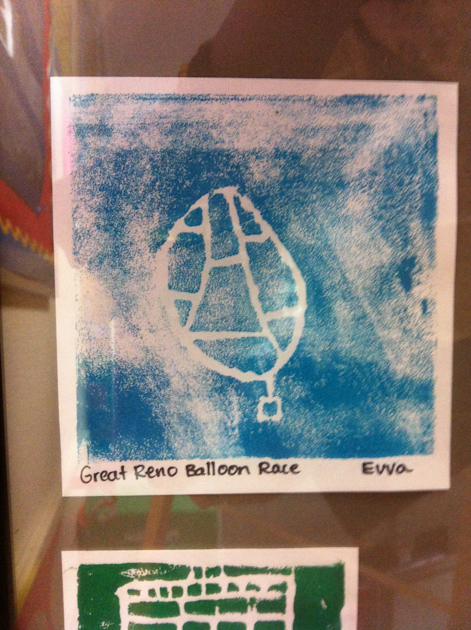
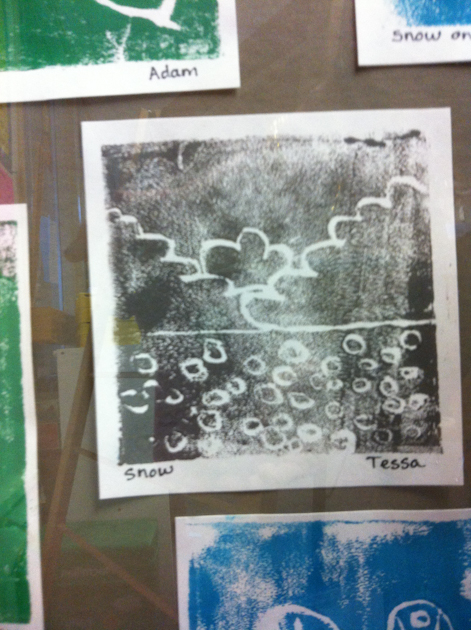
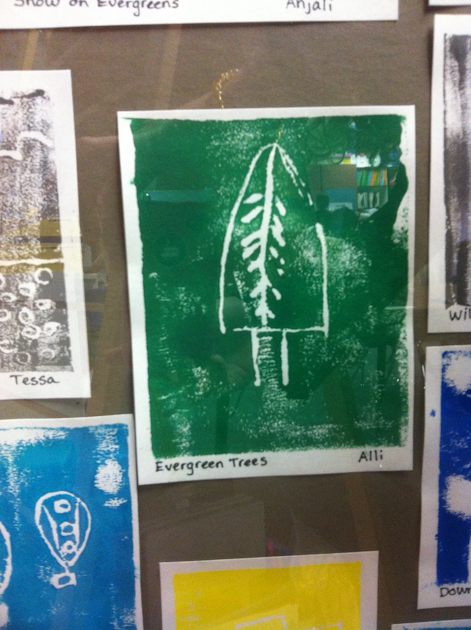
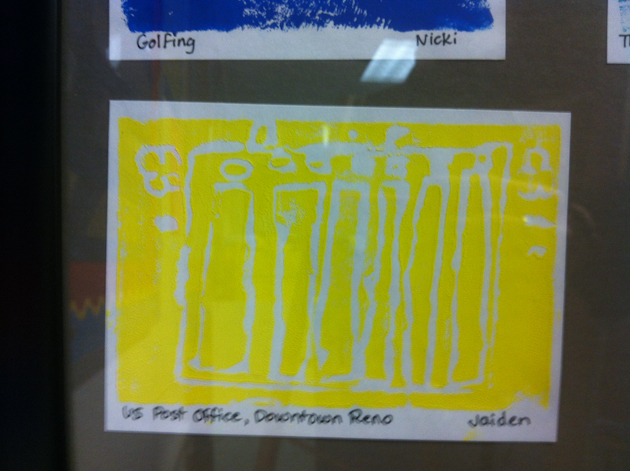
Here are some close ups of each print:

20120503-IMG_4865

20120503-IMG_4892
20120503-IMG_4891

20120503-IMG_4890

20120503-IMG_4888

20120503-IMG_4887

20120503-IMG_4886

20120503-IMG_4885
20120503-IMG_4884

20120503-IMG_4882
20120503-IMG_4881
20120503-IMG_4880
20120503-IMG_4879
20120503-IMG_4878
20120503-IMG_4877

20120503-IMG_4876
20120503-IMG_4875

20120503-IMG_4873
20120503-IMG_4874

20120503-IMG_4872

20120503-IMG_4871

20120503-IMG_4870
20120503-IMG_4869

20120503-IMG_4868

20120503-IMG_4867

20120503-IMG_4866
20120503-IMG_4865